
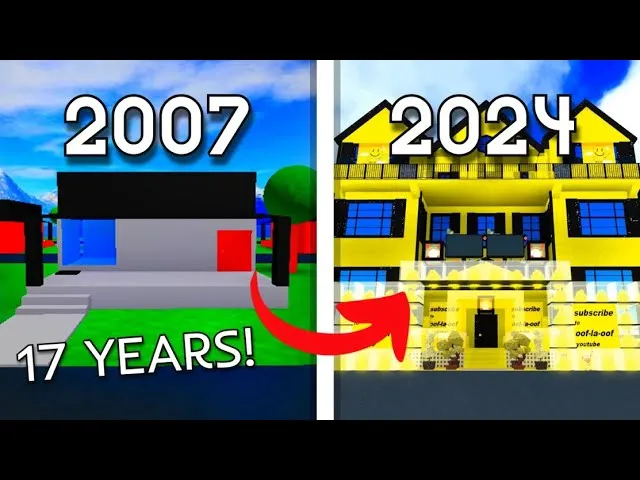
Work at a Pizza Place is famous for its six-role pizza pipeline, but the real goldmine sits outside the kitchen. Every T-shaped main island hides a Supply Dock, a rooftop crawl space, and a basement furniture cache that most players walk past for their first 50 hours. This guide breaks down where the supply dock sits, what's stashed on the roof, and which basement nook yields the best free furniture spawns — so new players stop grinding paychecks and start collecting cosmetics the cheap way.
The map in Work at a Pizza Place is a single T-shaped main island built around Builder Brothers Pizza, with twelve player houses behind it, a supply station, and The Dump out front, all surrounded by an explorable ocean according to the community-maintained map wiki. Players spawn on the main island every time they join, which means the secrets listed below are reachable within five minutes of loading in if you know where to look. According to the official Work at a Pizza Place game page, the experience has accumulated more than 5.58 billion visits and 13.5 million favorites, so any repeatable secret here has been discovered, shared, and re-verified by a huge player base.
Finding the Supply Dock Location on the Main Island
The supply dock is the single most important landmark for any player chasing cash and cosmetics, because it's the only point on the main island where Supplier runs begin and where crate spawns overlap with the secret tunnel entrance. On the standard T-shaped layout, the dock sits on the ocean edge of the supply station's backyard, facing the side of the island opposite The Dump.
Where the Supply Dock Sits on the T-Shaped Map
The main island is split into three functional zones: a front parking area with Builder Brothers Pizza and The Dump, a middle row of twelve player houses, and a back lot dominated by the Supply Station. The supply dock is the narrow wooden pier that juts out from the supply station's back fence into the ocean, and the only way to reach it on foot is to walk through the supply station gate, past the cardboard boxes, and around the back wall. From the spawn point, head away from the pizzeria front doors, take the road that runs between the houses and the supply station, and the dock appears behind the chain-link gate on the ocean side. The position is fixed across server resets because the supply station building is a non-destructible prop, so the dock works as a reliable landmark for any other secret-routes planning you do on the broader map guide.
What the Supply Dock Actually Does
Players who have never chosen the Supplier role assume the dock is just decoration, but it's the spawn point for the wooden crates that the Supplier carries to the kitchen. Every few minutes, a Supplier Crate materializes on the dock with a glowing outline, and picking it up before another player triggers a money payout tied to the delivery run. The dock also doubles as the entrance to the Secret Tunnel, a buried path that connects the supply station directly to The Dump and skips the entire front-of-house road. According to player reports, the tunnel shortcut saves roughly 30 seconds per supply run, which compounds quickly when grinding for furniture money.
| Supply Dock Landmark | Position on the T-Island | Primary Function | Secondary Use |
|---|---|---|---|
| Wooden Pier | Back of Supply Station, ocean-facing | Supplier Crate spawn point | Secret Tunnel entrance |
| Chain-Link Gate | Between station and pier | Supplier-only access | Free furniture drop location |
| Back Fence Corner | Left side of the dock, near beach | Crate stacker spawn | Climbing anchor for roof access |
| Stacked Crates | Dock's north edge | Visual landmark | Step ladder to roof |
Common Mistakes New Players Make at the Dock
Most beginners ignore the dock entirely because no UI marker points to it, then wonder why other players are always grabbing crates before they spawn. The two biggest rookie errors are walking into the front of the supply station and trying to use the kitchen door, which is Cashier/Manager territory, and trying to swim to the dock from the beach, which causes an immediate respawn. Stick to the back-gate route and the supply dock becomes a one-minute loop on every shift.
Climbing to the Roof for Secret Stashes
The roof of the Builder Brothers Pizza building is the single highest-value exploration target on the island, because it's where the developers hide cosmetic crates, an alternate view of the parking lot, and a one-way shortcut back into the second floor of the pizzeria. Reaching the roof requires a specific route through the supply dock, which is why this section always follows the dock guide above.
The Step-by-Step Route From the Dock to the Roof
The roof climb is not a glitch; it's a designed traversal that uses the supply dock's stack of wooden crates as a step ladder. Start at the dock, face the back-left corner of the supply station, and look for the tallest Crate Stack wedged against the back wall. Jump onto the smallest crate, then chain jumps up the stack until you're standing on the supply station's roof. From there, walk along the back ridge of the building until you reach the gap that lines up with Builder Brothers Pizza. Jump the gap to land on the pizzeria's lower roof, then climb the slanted sign panel to reach the upper roof. The full route takes about 90 seconds for a new player and roughly 25 seconds once muscle memory kicks in.
What's Actually on the Roof
The roof is not just a view deck. There are three confirmed drop points that respawn on a slow timer, and each one is a real money or furniture reward rather than a cosmetic easter egg. The first is a Glowing Crate behind the AC unit, which pays out a flat tip when picked up. The second is a stack of two Furniture Boxes near the front edge of the roof, which can be carried down and dropped anywhere on the map to be claimed. The third is a small Coin Pile that respawns near the chimney, which is the only rooftop source of spendable cash in the game.
| Roof Item | Respawn Timer (community-tested) | Reward Type | Carry Mechanic |
|---|---|---|---|
| Glowing Crate (AC unit) | 4–6 minutes | Flat cash tip | Auto-collected on touch |
| Furniture Box (front edge) | 8–10 minutes | Free furniture | Must carry and place manually |
| Coin Pile (chimney) | 2–3 minutes | Stackable cash | Auto-collected on touch |
| Secret Badge Trigger | One-time | Badge + title | Stand on the AC unit for 10 seconds |
Players who pair the roof run with a Supplier shift clear an extra 200–400 coins per loop on top of their normal paycheck, which is why the route is so popular during event furniture grinds. The event grinding guide covers how to stack roof loot with seasonal drop bonuses for even faster farming.
Exploring the Basement Secrets
If the roof is about quick cash, the basement is about long-term cosmetics. The Builder Brothers basement sits below the main dining area, accessed through a panel behind the kitchen, and it's the largest free-furniture hotspot in the entire game. Most players never see it because the entrance is hidden behind a movable shelf, and the Manager role is the only role that can spawn the shelf-open animation for the whole server.
How to Enter the Basement From the Kitchen
The basement entrance is a square panel on the kitchen floor that looks like a repair hatch. To open it, walk to the back wall of the kitchen and push the tall metal shelf that's parked against the wall. The shelf slides aside, revealing the hatch. According to community data, the shelf can only be moved by a player with the Manager role equipped, but any player can follow another Manager through the hatch once it's open. The hatch leads to a small ladder room and then a long corridor with several side rooms that serve as the actual furniture caches.
The Free Furniture Spawn Rooms
The basement is split into four side rooms off a main corridor, and each room has a different furniture theme. The first room holds dining furniture — tables, chairs, and tablecloths in various colors. The second room holds kitchen furniture — ovens, prep counters, and sink units. The third room holds bedroom furniture, which is the rarest because most players don't realize bedroom sets exist outside the player houses. The fourth room is a small manager's office that drops Manager-only items like nameplates and the gold cash register.
| Basement Room | Furniture Theme | Rarest Drop | Respawn Behavior |
|---|---|---|---|
| Room 1 (left) | Dining | Striped Tablecloth | Respawns every shift reset |
| Room 2 (right) | Kitchen | Gold Oven | Respawns every shift reset |
| Room 3 (back) | Bedroom | Four-Poster Bed | Limited quantity per day |
| Manager Office | Manager-only | Gold Register | Manager role required |
Why the Basement Is the Best Free Furniture Spot
The reason the basement dominates every other free furniture location is quantity and theme spread. The Dump out front has free furniture too, but the spawn pool is randomized and leans heavily toward outdoor items like lawn chairs and grills. The basement has a curated set of indoor pieces that match the pizzeria aesthetic, which is the only way most free-to-play players can decorate their houses to look anything like the Builder Brothers interior. Players grinding toward a fully furnished mansion can pair basement runs with the mansion upgrade guide to plan which room themes to prioritize.
Putting the Three Secrets Together on a Loop
Each secret on its own is useful, but the real value comes from chaining the dock, roof, and basement into a single repeatable route that a player can run every shift. Because all three locations are clustered on the T-shaped main island, the full loop takes under 5 minutes and clears every free-furniture and coin spawn on the map.
The Recommended 5-Minute Secret Loop
The loop starts at the supply dock to pick up the Supplier Crate, climbs the roof to clear the Glowing Crate, Coin Pile, and any active Furniture Box, drops back down to the kitchen, opens the basement via a Manager-led shelf push, grabs one or two furniture pieces from each themed room, and ends at The Dump to cash in any unboxed items. Players who run this loop with a Supplier or Manager role equipped clear the most value because those roles can interact with the dock crates and the shelf puzzle on their own.
| Loop Stop | Approx. Time | Role Needed | Average Yield per Run |
|---|---|---|---|
| Supply Dock | 45 seconds | Supplier (recommended) | 1 crate + Secret Tunnel access |
| Roof | 90 seconds | Any | 1 Glowing Crate + 1 Coin Pile |
| Basement | 120 seconds | Manager (to open hatch) | 2–3 furniture pieces |
| The Dump | 30 seconds | Any | Trade-in for cash |
| Total | ~5 minutes | Mixed | 300–600 coins + furniture |
Best Roles to Use for the Loop
The loop works with any role, but the meta combination for new players is Manager + Supplier swapped every other loop. Manager is required to open the basement shelf, so one player on Manager keeps the loop flowing for everyone else in the server. Supplier is required to pick up the dock crate, so swapping keeps both critical nodes active. Cook, Cashier, Pizza Boxer, and Delivery can also tag along for furniture carry, which speeds up the basement clear. The cook and supplier role guide covers how to swap between these two roles without losing your shift progress.
When the Loop Stops Working
A few situations break the loop and waste time, so it's worth knowing the failure modes. If a private server is hosted with basement access disabled in the host settings, the shelf won't move and the basement leg of the route is dead. If a player has already looted the roof within the last five minutes, the respawn timers mean an extra empty run, which is why most grinders sync their loop with the server's spawn cycle. If you're playing on a high-traffic public server, expect competition for the Glowing Crate and the bedroom furniture in basement Room 3. The mistakes to avoid guide has a full breakdown of which servers to avoid for solo farming.
Comparing the Three Secret Locations Side by Side
Before wrapping up, it helps to see all three spots on the same set of axes so the trade-offs are obvious. Each location has a different value profile, and the best one to prioritize depends on whether you need cash, furniture, or badges.
| Secret Location | Cash Value | Furniture Value | Badge Value | Access Difficulty |
|---|---|---|---|---|
| Supply Dock | Medium (crate tips) | Low (rare drops) | None | Easy (any role) |
| Roof | High (Coin Pile) | Medium (Furniture Box) | High (secret badge) | Medium (climb route) |
| Basement | Low | Very High (themed rooms) | Medium (Manager badge) | Hard (Manager required) |
Which Spot to Farm First
New players who don't yet have a Manager role unlocked should start with the roof because the climb works for any role and the Coin Pile pays out the most consistent cash per minute. Players who already have Manager and want to decorate their house should jump straight to the basement because the themed furniture is irreplaceable through normal gameplay. The supply dock is best treated as a transit hub rather than a farming spot on its own, but it's the only way to access the Secret Tunnel, which makes it critical for any fast supply-run build.
Frequently Asked Questions
Where exactly is the supply dock location on the Work at a Pizza Place map?
The supply dock sits on the ocean-facing back edge of the supply station, accessible through the chain-link gate behind the building. It is the only spawn point for Supplier Crates and the entrance to the Secret Tunnel that links the supply station to The Dump. The position is fixed because the supply station is a non-destructible prop, so every server reset places the dock in the same spot on the T-shaped main island.
How do I reach the roof secrets in Work at a Pizza Place without getting stuck?
Start at the supply dock, jump onto the back-left Crate Stack against the supply station wall, chain jumps up the stack to the supply station roof, walk the back ridge, jump the gap to the pizzeria lower roof, and climb the slanted sign panel. The full climb takes about 90 seconds for a new player and unlocks the Glowing Crate, Coin Pile, Furniture Box, and the one-time secret badge on the AC unit.
What kind of free furniture spawns in the basement of Work at a Pizza Place?
The basement has four themed rooms: dining furniture in Room 1, kitchen furniture in Room 2, bedroom furniture in Room 3, and Manager-only furniture in the back office. The bedroom room is the rarest because most players don't realize bedroom sets exist outside the player houses, and the Manager office requires the Manager role to access the gold register and nameplate drops.
Do I need the Manager role to open the basement hatch in Work at a Pizza Place?
Yes, only a player with the Manager role equipped can move the metal shelf that hides the basement hatch in the kitchen. Any other player can follow the Manager through once the hatch is open, so it's common to ask a Manager in the server for a quick hatch open. Private servers can disable basement access entirely through host settings, which breaks the route for everyone on that server.
Can I combine the supply dock, roof, and basement into a single farming loop?
Yes, the three spots form a natural 5-minute loop because they sit in a line on the T-shaped main island. The recommended order is supply dock for the crate, roof for the Coin Pile and Glowing Crate, basement via a Manager-led shelf push for two to three furniture pieces, and The Dump to cash in any unboxed items. Running the loop with Manager and Supplier roles swapped every other cycle clears the highest value per minute.