
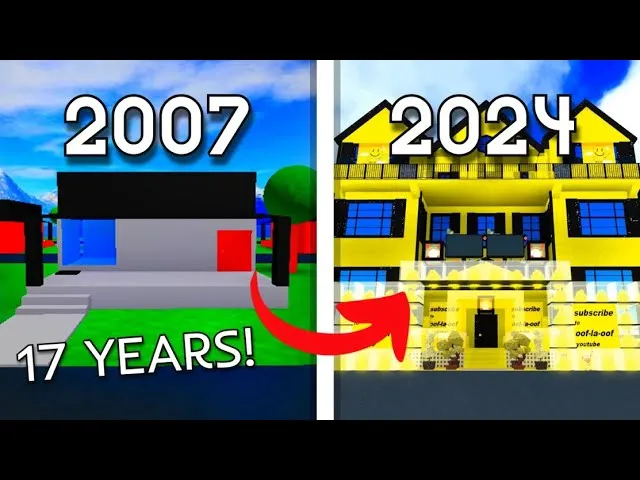
Most players grind paychecks for months before they realize the real endgame of Work at a Pizza Place lives inside the housing system, not on the pizzeria floor. A second house slot changes that entire loop because it lets you split your coin stack between two interiors, rotate seasonal furniture, and stop trashing every piece you outgrow. This furniture guide walks through the second house slot, the full furniture catalog, and the placement rules so your coin turns into a livable home instead of a cluttered box.
What the Second House Slot Actually Unlocks
The second house slot is the upgrade that flips the housing system from "one interior you keep outgrowing" into "two interiors you actually rotate through." According to the community-maintained Work at a Pizza Place wiki, every player starts with one home and unlocks additional slots as they progress through the house ladder, with the second slot typically becoming available once a mid-to-late classic house is reached and a separate unlock prompt appears in the housing menu.
Slot Rules, Ownership, and Switching Cost
You can only own one house per slot, but the second slot is fully independent from the first — your classic shack furniture does not transfer, your garage pass does not auto-apply, and your Garage Gamepass does not grant a second house. Switching is free, costs zero coins, and the moment you select a different home, your character teleports inside it while the previous interior is frozen exactly as you left it.
| Feature | First House Slot | Second House Slot |
|---|---|---|
| Unlocked by default | Yes | No (house ladder + extra cost) |
| Independent furniture storage | Yes | Yes |
| Affected by Garage Gamepass | Yes (when held) | Yes (must own pass separately per slot) |
| Backyard / Basement upgrades | One set per slot | One set per slot |
| Free switching | Yes | Yes |
| Sell-back refund rate (Dump) | 25% of original price | 25% of original price |
The community wiki confirms that each slot holds its own placement caps, so loading a mansion with the full 600-item cap does not eat into what you can place inside a tiny house on slot two.
Why a Second Slot Matters for Endgame Players
A second slot lets you build two distinct interior identities — one themed for visiting, one themed for grinding — without nuking your coin progress. Players running seasonal furniture rotations (Halloween, Christmas, Neon Time drops) often park the holiday items in slot two so slot one stays clean for daily play, then swap back when the event ends. This is the same pattern the Work at a Pizza Place house upgrade list uses as the structural backbone for a two-house build.
Browsing the Furniture Catalog From Scratch
The furniture catalog inside Work at a Pizza Place is the centralized storefront that lists every chair, table, rug, wall mount, and decorative prop purchasable with coins, and it is split between the Large Catalog (premium rotating stock) and The Dump (discount bin refresh). According to the official game page on Roblox, coins are the universal currency, and every catalog purchase is final unless you sell back at The Dump for a reduced refund.
Large Catalog vs The Dump at a Glance
| Source | Refresh | Average Discount | Best For |
|---|---|---|---|
| Large Catalog (premium) | Rotates weekly | 0% (full coin price) | New furniture, rare items, theme anchors |
| The Dump | Every 3 hours | 40–75% off (community-reported) | Filling empty walls, bulk rugs, filler chairs |
| Event Catalog (seasonal) | Per event window | 0% (limited stock) | Halloween, Christmas, Neon Time exclusives |
| Robux Catalog | Always | N/A (premium currency) | Bypassing coin grind, Garage Gamepass tier |
The Dump is the engine that lets a mid-coin player build a fully furnished house, because the 3-hour refresh cadence means roughly eight opportunities per day to grab a deeply discounted sofa or bookshelf. Players serious about furnishing on a budget set alarms and clear The Dump on every refresh.
Catalog Categories Worth Knowing
The catalog is divided into functional buckets so you can browse by room type instead of scrolling the full list. Seating (chairs, sofas, beanbags), surfaces (tables, counters, desks), wall decor (paintings, decals, frames), lighting (lamps, neon signs, ceiling fixtures), and appliances (kitchen props, arcade machines, jukeboxes) each get their own subsection. Most players start with seating and lighting, because those two categories alone change how a room reads at a glance.
Furniture Placement Rules That Save You From Refunds
Placement is where most players lose hours of coin progress, because furniture in Work at a Pizza Place is constrained by invisible snap points, wall anchors, and a per-house item cap that triggers a "House Full" warning long before the visual layout actually feels full. Community testing reported by players shows the effective ceiling is around 600 placed items per interior, and that number is shared across both slots but counted separately per slot.
Snap Points, Wall Mounts, and Floor Tiles
| Placement Type | Snap Behavior | Common Mistake |
|---|---|---|
| Floor furniture (sofas, tables) | Snaps to grid | Forcing rotation breaks snap and causes overlap |
| Wall decor (paintings, frames) | Snaps to wall anchors | Placing on the back side of a wall still counts toward cap |
| Ceiling lights (chandeliers, fans) | Snaps to ceiling grid | Heavy items on a low ceiling block character movement |
| Doors / arches | Locks to wall edge | Moving a wall panel without re-placing the door causes clipping |
| Outdoor props (planters, benches) | Snaps to yard grid | Backyard upgrade required, otherwise items float |
The biggest sink is wall decor, because the game counts items placed on the "outside" of a wall toward the cap even though the player never sees them. Veteran players place decor only after walking the room and confirming the visible face of every wall.
The 600-Item Cap and How to Plan Around It
The 600-item cap is the single biggest constraint on a second house, and it forces a tradeoff between quantity and quality. Community reports indicate the Large Catalog sells certain items in "stacks" (a 4-pack of chairs counts as 4 toward the cap, not 1), so big lots eat cap faster than single pieces. The fix is to treat the cap as a budget and allocate roughly 50% to floor furniture, 25% to wall decor, 15% to lighting, and 10% to outdoor props — that split leaves headroom for event drops without forcing a sell-back session.
The Best Furniture Picks for a New Second House
The "best" furniture in Work at a Pizza Place is a moving target because the Large Catalog rotates weekly, but a few items show up consistently in community tours and YouTube house tours (such as the Money Fast guide by Super Shorts Central, which highlights coin priorities that free up furniture budget). Below is a stable shortlist that holds up across refreshes.
Anchor Pieces That Define a Room
| Furniture Item | Role in a Room | Coin Tier | Best Placement |
|---|---|---|---|
| Large sectional sofa | Living room anchor | Premium | Center of main wall |
| Bookshelf (tall) | Vertical filler | Mid | Flanking a doorway |
| Jukebox | Social + audio | Premium | Corner near a chair cluster |
| Neon sign (event-tied) | Statement wall | Event-only | Above the sofa |
| Rug (large) | Floor unifier | Mid | Under seating cluster |
| Plant (potted, tall) | Corner softener | Budget | Any empty 2×2 floor cell |
| Arcade cabinet | Back-of-house prop | Mid | Side wall, away from seating |
Anchor pieces are the 5–7 items in a room that the eye lands on first, and getting those right matters more than filling the cap with random chairs. Most two-house builds keep the anchor set identical in both slots and only rotate the smaller props.
Budget Filler That Looks Intentional
The Dump is where budget players win, and the rotation is good enough that most filler pieces do not feel like compromise. Stackable crates, basic chairs, plain rugs, single-bulb lamps, and unpainted wall shelves are all but guaranteed to appear every few days at 50%+ off. The strategy is to clear The Dump on a 3-hour timer and immediately place anything that matches your anchor palette, because unplaced purchases still sit in your inventory and can be re-sold at the next refresh, but the discounted price is locked the moment you buy.
Running Two Houses Without Burning Out
Owning two interiors sounds relaxing, but it doubles your decoration time, your cap pressure, and your sell-back decisions, so a simple weekly loop keeps both homes from rotting. The pattern below comes from community testing by players running dual classic + modern setups, and it scales to a classic + mansion pair on the mansion upgrade path.
A Sustainable Two-House Weekly Loop
-
Monday — clear The Dump, place anything matching the active slot's palette, sell back anything that breaks the anchor set.
-
Wednesday — visit the inactive slot, swap in 1–2 new pieces, leave the rest untouched.
-
Friday — run a paycheck grind on your highest-pay job (Delivery and Supplier are the coin-per-hour leaders), bank the surplus toward the next Large Catalog anchor.
-
Sunday — tour both houses with a friend, screenshot, and rotate one anchor piece between the slots for a fresh feel.
That loop keeps both interiors alive without forcing a full redecorate, and it lines up neatly with the Dump's 3-hour refresh so you never miss a discount window. It also leaves a coin buffer large enough to react when a rare item appears in the Large Catalog.
Selling Back Without Bleeding Coin
The Dump accepts sell-backs at a flat 25% of the original price, regardless of whether you bought the item at full price or at a discount, and that rule is the same across both slots. Players who bought a sofa at 60% off and immediately sell it back actually lose money, so the rule of thumb is to only sell items you bought at full Large Catalog price. The Dump selling guide breaks down the exact refund math, but the short version is: never panic-sell at a loss, and never sell event items unless the event is confirmed over.
Frequently Asked Questions
How do I unlock a second house slot in Work at a Pizza Place?
You need to reach a mid-to-late classic house on the upgrade ladder, then purchase the second slot prompt that appears in the housing menu. The exact coin price shifts with updates, but community data shows the slot becomes available once the Garage or Large House tier is reached.
Does the second house slot share its furniture cap with the first slot?
No, each slot has its own independent cap of roughly 600 items. Filling the first slot does not reduce what you can place in the second, which is why a two-slot setup is the standard endgame layout for serious decorators.
Can I move furniture between the two house slots for free?
No, furniture does not transfer between slots. Items placed in slot one stay in slot one, and items placed in slot two stay there. To redecorate a slot, you must sell back at The Dump and repurchase in the target slot.
What is the best way to furnish a new second house on a budget?
Clear The Dump on every 3-hour refresh for the first week, buy only stackable filler and budget lighting, and resist the Large Catalog until you have at least one anchor piece. Community testing shows this approach fills a small house in roughly 4–5 days without touching premium coin.
Is the Garage Gamepass required for both house slots?
Yes, the Garage Gamepass must be owned separately for each slot if you want garage storage in both homes. The pass does not auto-apply, and there is no bundle that covers two slots at a discount, so plan your Robux budget around that doubled cost.